
Thursday, 17 December 2015
Wednesday, 16 December 2015
Consent Forms
Here are the consent forms that we got our actors to sign before production began on our music video. This meant that they gave us full creative control over their performances when editing. This also meant that we could post the end product on our blogs and YouTube.

Ben Hesketh

Ben Seager

Amy Petts
Nathan and Tom
Tuesday, 15 December 2015

Monday, 14 December 2015
Our Magazine Advertisement Ideas

Michael


Here is my idea for the magazine advert for our music video INSOMNIA by Ben Hesketh. I wanted to keep my advert the same as my Digipak as that why it would all tie in nicely as one bundle. I have again chosen to use a mid shot of our artist Ben with harsh lighting on one side of his face. This is a shot through out the music video helping to link it to the video its self. I wanted the advert to feel quit personalised so i decided to add Ben's signature at the bottom to help make it more personal to the artist.
Tom
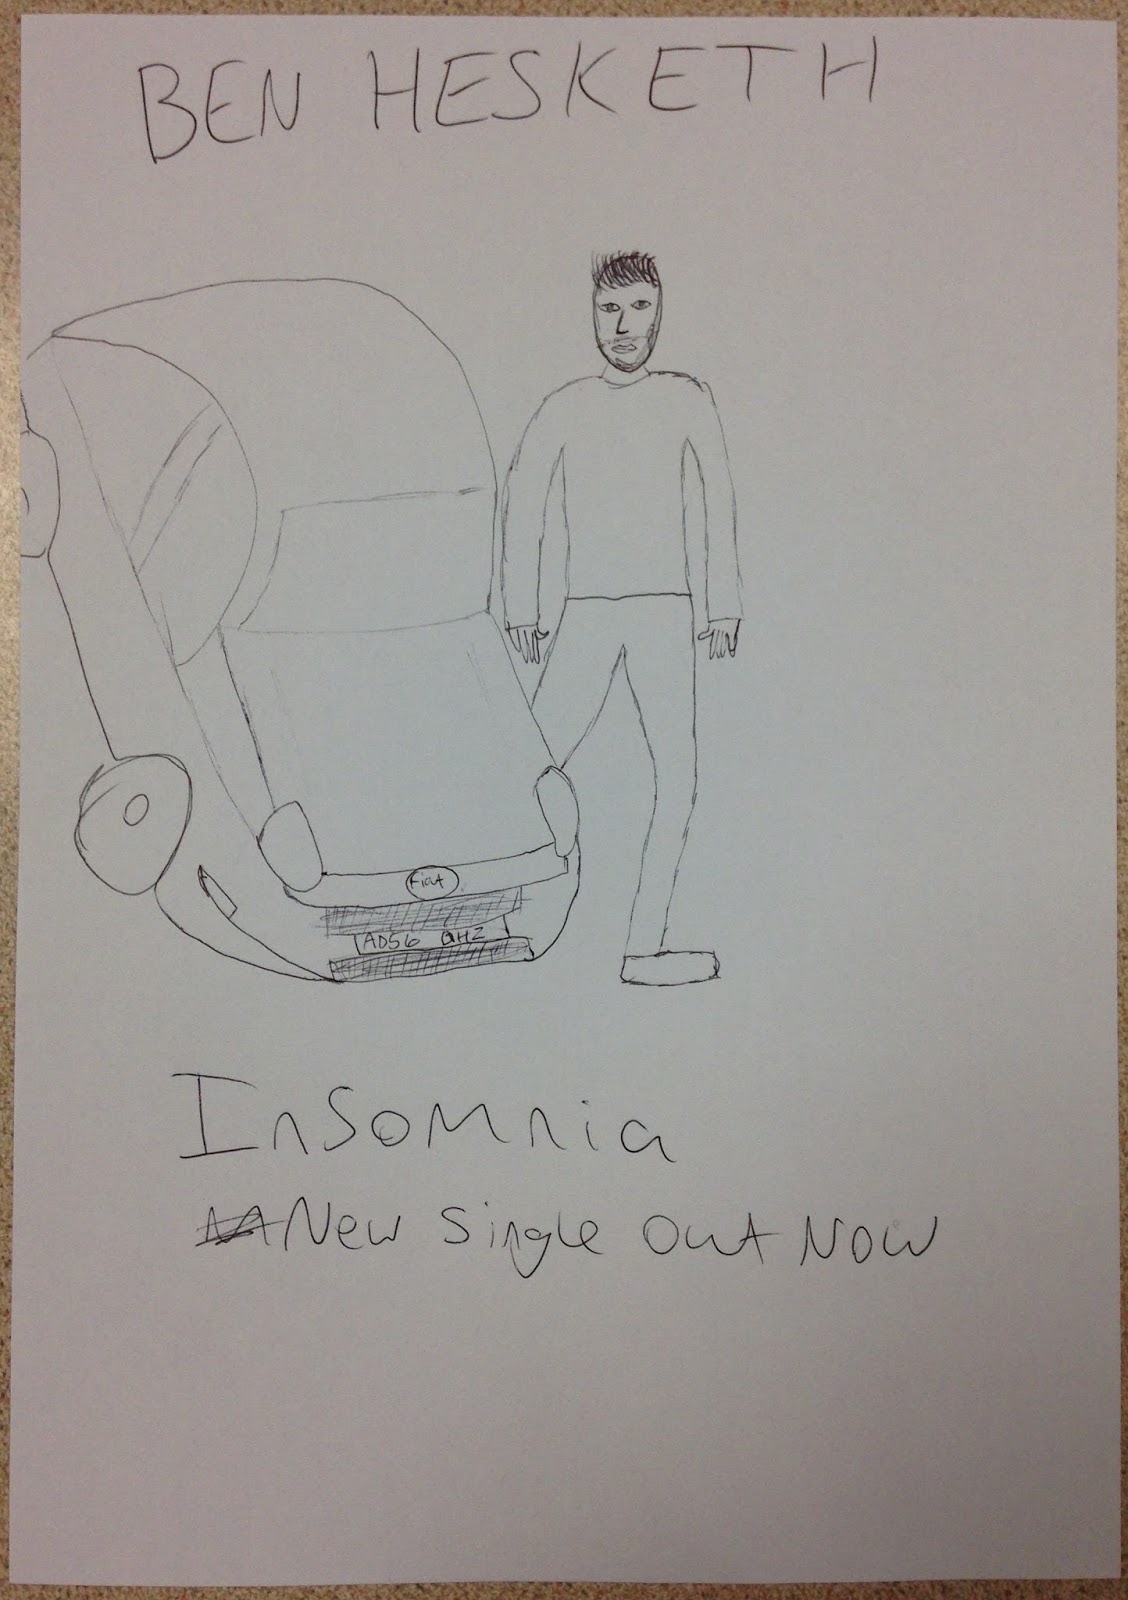
I decided to feature car in my magazine advert, as it is used very often in the music video. This means that people would be able to associate the products easily.
Nathan
Friday, 11 December 2015
Target Audience Brief

The target audience for our music video is based on the audience for the Electronica. The audience for the Electronica genre is young adults in the 16-35 age bracket including both males and females. This tends to be the age group that goes clubbing since this is the music that tends to be played. The age group for our music video is 16-35 as the themes and narrative of the video are appropriate for this age and can be understood, additionally it is aimed at both males and females since Electronica is not aimed at one particular gender.


Michael
Thursday, 10 December 2015

Magazine advert shot list

Here is the shot list for our magazine advert, we have made this so we know what shots we need to get, where we need to take them and what equipment we need. One only have one location but it will still save us a lot of time and will mean we are more organised on the day of the shoot.
Tom
Digipak shot list

Here is the shot list for our digipak, we have made this so we know what shots we need to get, where we need to take them and what equipment we need. Due to the fact that we have a few different locations it will save us a lot of time and will mean we are more organised on the day of the shoot.
Tom
Our rough digipak ideas

This is my rough digipak for our music video. (I'm pretty sure I did the whole thing upside down?) But anyway, there is a picture of Ben lying in bed, which links to the music video, there are lyrics of the song so the target audience can read them if they want to. There is a bio that Ben would've written about himself so that the people who buy the single can get to know him better. The theme of this digipak is dark/black to match the feelings that Ben is feeling about his guilt which is why I have shaded the digipak to show the black background.
Sophie

This is the rough version of my digipak idea for the group. In have based it the shots of in the film took while filming. In the bottom half of the digipak I have made 3 separate pictures/frames. One is a artist profile and the other is the front cover which is based on a sunset in one of the film locations. The other half is 3 sections that make up one picture. This half is of the car driving past the field. I have decided to put song lyrics on one of the sections.
Michael

This is my rough digipak idea. I decided to feature the lyrics on the back to interest the audience. I have also included an artist profile to interest anyone who wants to learn more about Ben. The artist profile would also be effective later on in the artist's career as fans could test their knowledge. I decided to feature the car on the front cover as, in the music video, Ben is seen driving in it very often. This helps to link the digipak with the music video, creating a sense of synergy.
Nathan

This is my rough digipak idea. I have also decided to feature the lyrics on the back to interest the audience. I have included a profile about the artist to let people know about bens background. I decided to feature just the artist on the front cover, this is the same type and style of shot as the same repeating shot in our music video, This too helps to link the digipak with the music video, creating a sense of synergy.
Tom
Wednesday, 9 December 2015
Music Video Draft 6 with Feedback
Mr Bluck:
The time lapse sky shot is probably over-used, maybe use it just to signify time passing without returning to it.
At the beginning when the artist is in bed, he is asleep... do you have a shot of him lying with his eyes open? The track is called 'Insomnia' and he is fast asleep.
There is a bit of confusion when this cuts to the flashback as it isn't particularly clear that this is a dream? Is it a dream? Or is it a memory? If the denouement is that he can finally sleep after making amends then there needs to be a clearer visual definition between the present and the past.
Tuesday, 8 December 2015
Lighting
When filming our music video, we knew we would have to pay close attention to the lighting to properly connote the feelings and over all look we wanted for our music video.
For example, as in our questionnaire, we found that people associate the colour blue with sadness, guilt, night time etc.. Therefore, we decided to light and colour grade many of the shots with a blue/green tint, in order to connote this to the audience.

We also decided to have Ben wearing a blue tie when he lip syncs. The idea to have him wear a tie was originally a solution to a problem where his body could not be seen at all as he was wearing a black shirt against a black background. We did this to avoid having Ben looking like a floating head which would have been very distracting throughout the music video and may not have made much sense from a narrative stand point.
We decided to light Ben's face during the lipsyncing section the way we did because we wanted to connote the difference between the carefree version of himself before the incident (light side of the face) and the guilty side (the dark side).

When we filmed the shot where Ben walks back into his house after driving home in the evening, it was too dark to actually see what we were recording with out raising the IOS on the camera extremely high causing unwanted noise in the picture. Therefore, we decided to light the scene with two 1000w soft boxes with the diffusion panels removed for maximum light and one 300 LED panel which we used to help us light the car and act like a street light. We created this effect by putting the LED panel on a 3meter boom pole to get the needed height and we added a tungsten coloured jell in order to make the effect realistic.
Nathan and Tom
Friday, 4 December 2015
Our Favourite music videos and Why?
I have chosen this music video to call my favourite because the attention to detail is insanely good. The production cost was millions and this shows in the video. The narrative is of female badass assassins that completes stunts. It's a major girl power video which is why it is one of my favourites, Taylor has also never created a video as "harsh" as this before as her previous ones are love stories which is refreshing.
Sophie
I have chosen this music video because the storyline is very interesting. The narrative is about a woman who craves attention and love who threatens to commit suicide in order to get attention. It is revealed at the end of the music video that she does this repeatedly.
I have chosen this music video for a few reasons. I like this video as it is a literal representation of the lyrics. Each image shown with in the music video represents the lyrics, however not all are obverse, some you have to look closer and the shot in order to work out the connection.
Tom
I have chosen this music video since I like the focus on both narrative and live performance has it has a good mix of between the two, this is due to the fact the screen time of each is similar and therefore the music video doesn't get repetitive. Additionally the video looks like it has a good production value and the cutaways keep the video fresh.
Michael
Tom, Mike, Sophie and Nathan
Music Video Draft 5 and Feedback
Sheffield Examiner Feedback
Also it is not just the necklace that they are both loosing sleep over, Ben is consumed with guilt for not attempting to stop the mugging from taking place and Amy is completely shaken up by the fact that she was attacked thus making them not able to sleep.
Michael, Sophie
- Excellent start, smooth camera work especially when he walks through the car park and I like the water dripping in time to the music, camera is amazing by the way - looks crisp and professional.
- The attack sequence is spoilt by the fact that the girl seems to be smiling and not actually convincing in her "acting."
- Camerawork in the car and around the car is excellent, looks professional at times and I like they have someone who actually looks like a medic.
- The blank background works at first but then becomes overused to the point of being repetitive, different backgrounds - appearing at the car park etc might have been better plan because then the singer could become more involved in the narrative rather than being a crutch to keep cutting back to.
- The bit where he keeps cutting between the guy on the wall and the time lapse becomes a bit over used, although the lip synching video is excellent.
- Pity when he gets home "late at night" the clock in the background is saying about half five, suggests to me they shot straight after school.
- Took me ages work out why he gives her the earbuds at the end, not exactly something I would lose sleep over is it? Stakes should be higher?
- Some excellent work here but the narrative of the video is a bit confused and a little bit repetitive.
Also it is not just the necklace that they are both loosing sleep over, Ben is consumed with guilt for not attempting to stop the mugging from taking place and Amy is completely shaken up by the fact that she was attacked thus making them not able to sleep.
Michael, Sophie
Filming
Day 1
The first location we filmed in was the multi-story car park. We started off by filming the lift door VFX shot.
This shot has been covered in a previous post.
We then proceeded to film the other shots, including:
Day 2
On the second day of shooting, we started by filming all of the shots of Ben lying in bed. We did this by using a crane we had made for our film opening, last year. I secured the crane at the back to ensure the camera would not fall onto the actor, in the event that Tom dropped it.

We also used this set-up for the areal shots of Ben getting into bed.
We then used a black bed sheet as a black backdrop for the lip syncing.

We then moved on to film the panning shots of Ben driving, after he leaves the car park.
Day 3
On the third day of shooting, we started by filming the shots of Ben pulling over on the side of the road, after he leaves the mugging, to calm himself down. We decided to film these shots, as otherwise, the video would not make sense - he leaves the mugging while the victim is by her car and by the time he gets outside, she is already there, with the paramedic. Adding in these shots helped to show the passing of time, between the two scenes.
We then went to the underpass, to film the fight scene.

Day 4
On the fourth day, we shot in the café - we had originally planned to film this on the third day but the café we had planned to use, cancelled. Therefore, we decided to call The Rose Café in Chelmsford, on the Friday, and they let us film in their café on the Sunday.
Nathan
The first location we filmed in was the multi-story car park. We started off by filming the lift door VFX shot.
This shot has been covered in a previous post.
We then proceeded to film the other shots, including:
- The tracking shot of Ben walking to his car
- The mugging
- The shots of Ben driving away
- The shots of Ben driving past the paramedic and the victim of the mugging
Day 2
On the second day of shooting, we started by filming all of the shots of Ben lying in bed. We did this by using a crane we had made for our film opening, last year. I secured the crane at the back to ensure the camera would not fall onto the actor, in the event that Tom dropped it.

We also used this set-up for the areal shots of Ben getting into bed.
We then used a black bed sheet as a black backdrop for the lip syncing.

We then moved on to film the panning shots of Ben driving, after he leaves the car park.
Day 3
On the third day of shooting, we started by filming the shots of Ben pulling over on the side of the road, after he leaves the mugging, to calm himself down. We decided to film these shots, as otherwise, the video would not make sense - he leaves the mugging while the victim is by her car and by the time he gets outside, she is already there, with the paramedic. Adding in these shots helped to show the passing of time, between the two scenes.
We then went to the underpass, to film the fight scene.

Day 4
On the fourth day, we shot in the café - we had originally planned to film this on the third day but the café we had planned to use, cancelled. Therefore, we decided to call The Rose Café in Chelmsford, on the Friday, and they let us film in their café on the Sunday.
Nathan
Wednesday, 2 December 2015
Music Video VFX
There are three shots in our music video that had to be edited, using visual effects:
The Lift Door Shot
The first idea we had, regarding VFX, was to composite the title of the song, Insomnia, onto the lift doors, with half of the word on the left door - INSO - and half on the right - MNIA.
To do this I intended to track the doors of the lift separately and then parent the writing to each door respectively. I used small pieces of tape to act as tracking points on the door.
 However, due to the way the light reflected off of the metal doors, Motion (the compositing software) could not track the points I had used. To fix this issue, I decided to keyframe the text to move along with the doors, sticking as closely as possible to the correct points. This was made more difficult, by the fact that the doors did not open at one consistent speed - they changed speed a lot, while opening.
Once I had keyframed the text, I added some motion blur to the layer to make it blend in more with the background. I keyframed the motion blur to come in when the door starts to move and stop when the door is fully open.
As the tracking points had not worked, I realised that by adding the tape to the door I had only made the shot look less appealing, with no added benefits. Due to this, I decided to digitally remove the tape in Motion.
The first step I took to remove the tape was to duplicate the footage and to move the duplicated clip, which was beneath the main clip, up and to the left. This ensured that the tape on the duplicated clip was not overlapping with the main clip. I also ensured that the curved light reflections on both layers stayed in line with each other.
 Then I masked around the tape on the right-hand door in the top layer, revealing the clean part of the layer below. I then feathered the mask to make it blend more convincingly. To remove the tape on the left-hand door, I keyframed a mask to move around the 'O'.
Once all of the tape had been removed, I realised that if the text were really on the doors, there would be reflections on the sides next to them.
To add the reflections, I exported the entire project, to make it one video, and then started a new composition. I then duplicated the footage. With the top layer of footage, I rotated it on the Y-axis 180 degrees to make it look like a mirror image. I then moved the layer to the right, until the left side of the left door was perfectly in line with the right side of the right door.

I then dropped the opacity to 23.29% to make it seem more like a reflection in a dirty surface. I then masked around the 'MNIA' part of the text.

This then moved perfectly in time with the main text, however, the reflection could be seen on the wall next to the lift as well. To fix this, I added another mask, on top of everything, to remove the text on parts that would not be reflecting it if it were there in real life. I then did the same thing for the other side - the 'INSO' part.
I had then finished the VFX for this shot:
The Evening Driving Shot
When we shot part of the music video - the part where Ben walks into his house - it had got much later in the day than we had planned so it was very dark. We decided to try to fix this issue by lighting the scene with two 1000w softboxes and one 300 LED panel but the scene still looked too dark. To fix this, we decided to colour grade the driving shots that happened before hand to be much darker and look like evening. We also ended the timelapse section by have it move into late evening, which aids this.
Once we had decided to colour grade the driving shots to look darker, we started testing to see if it were plausible. We found that with one of the shots, we would have to colour grade it in three different sections - the outside, the inside (minus the mirror) and the mirror.
To do this, I duplicated the clip twice, so there were three different layers of the same clip. I then tried to track the mirror but there were no successful tracking points. Therefore, I chose to keyframe the mask to move with, and change shape according to, the mirror.
Once I had done this, I duplicated this mask data and applied it to the next layer. I then inverted the mask to capture everything but the mirror. Then, on the top layer, I keyframed a mask around the ceiling of the car.
Once all of the layers were isolated, Tom then colour graded each layer accordingly to make them look like they were shot during the evening. Once he had done that, I feathered each mask to make them blend more convincingly.
The shot was then finished and was ready to be put into the music video.
The Evening Shot of Ben Walking Up the Stairs
Before:

After:

First, we filmed a video in similar lighting and framing of the clock at the correct time.
I then tracked the motion of clock in the first part of the shot. I used two tracking points to allow me to track both the position and the size of the clock.
I then masked around the clock on the replacement shot so that I could position and size it. Tom then colour graded the clock to better match the scene and I applied the tracking data to the new clock.
I then moved on to the last part of the shot and did the same thing - tracking and applying the data.
Then, I keyframed the middle section so that it stayed where it should.
After I had done this, I needed to keyframe a mask (rotoscoping) around Ben so that the clock moved behind him. To do this, I duplicated the original footage and made a mask around the actor. I then went forward, frame-by-frame, to remove the clock.
I then added some noise to the clock layer, to make it fit in with the original footage more convincingly. Then I added some defocus blur to make it fit in with the part of the shot it was in. As the shot is moving, I needed to keyframe it to become further out-of-focus as the camera moves further away. The shot was then complete.
Nathan
- The lift door opening shot
- The evening interior driving shot
- The evening shot of Ben walking up the stairs
The Lift Door Shot
The first idea we had, regarding VFX, was to composite the title of the song, Insomnia, onto the lift doors, with half of the word on the left door - INSO - and half on the right - MNIA.
To do this I intended to track the doors of the lift separately and then parent the writing to each door respectively. I used small pieces of tape to act as tracking points on the door.

Once I had keyframed the text, I added some motion blur to the layer to make it blend in more with the background. I keyframed the motion blur to come in when the door starts to move and stop when the door is fully open.
As the tracking points had not worked, I realised that by adding the tape to the door I had only made the shot look less appealing, with no added benefits. Due to this, I decided to digitally remove the tape in Motion.
The first step I took to remove the tape was to duplicate the footage and to move the duplicated clip, which was beneath the main clip, up and to the left. This ensured that the tape on the duplicated clip was not overlapping with the main clip. I also ensured that the curved light reflections on both layers stayed in line with each other.

Once all of the tape had been removed, I realised that if the text were really on the doors, there would be reflections on the sides next to them.
To add the reflections, I exported the entire project, to make it one video, and then started a new composition. I then duplicated the footage. With the top layer of footage, I rotated it on the Y-axis 180 degrees to make it look like a mirror image. I then moved the layer to the right, until the left side of the left door was perfectly in line with the right side of the right door.

I then dropped the opacity to 23.29% to make it seem more like a reflection in a dirty surface. I then masked around the 'MNIA' part of the text.

This then moved perfectly in time with the main text, however, the reflection could be seen on the wall next to the lift as well. To fix this, I added another mask, on top of everything, to remove the text on parts that would not be reflecting it if it were there in real life. I then did the same thing for the other side - the 'INSO' part.
I had then finished the VFX for this shot:
The Evening Driving Shot
When we shot part of the music video - the part where Ben walks into his house - it had got much later in the day than we had planned so it was very dark. We decided to try to fix this issue by lighting the scene with two 1000w softboxes and one 300 LED panel but the scene still looked too dark. To fix this, we decided to colour grade the driving shots that happened before hand to be much darker and look like evening. We also ended the timelapse section by have it move into late evening, which aids this.
Once we had decided to colour grade the driving shots to look darker, we started testing to see if it were plausible. We found that with one of the shots, we would have to colour grade it in three different sections - the outside, the inside (minus the mirror) and the mirror.
To do this, I duplicated the clip twice, so there were three different layers of the same clip. I then tried to track the mirror but there were no successful tracking points. Therefore, I chose to keyframe the mask to move with, and change shape according to, the mirror.
Once I had done this, I duplicated this mask data and applied it to the next layer. I then inverted the mask to capture everything but the mirror. Then, on the top layer, I keyframed a mask around the ceiling of the car.
Once all of the layers were isolated, Tom then colour graded each layer accordingly to make them look like they were shot during the evening. Once he had done that, I feathered each mask to make them blend more convincingly.
The shot was then finished and was ready to be put into the music video.
The Evening Shot of Ben Walking Up the Stairs
Before:

After:

First, we filmed a video in similar lighting and framing of the clock at the correct time.
I then tracked the motion of clock in the first part of the shot. I used two tracking points to allow me to track both the position and the size of the clock.
I then masked around the clock on the replacement shot so that I could position and size it. Tom then colour graded the clock to better match the scene and I applied the tracking data to the new clock.
I then moved on to the last part of the shot and did the same thing - tracking and applying the data.
Then, I keyframed the middle section so that it stayed where it should.
After I had done this, I needed to keyframe a mask (rotoscoping) around Ben so that the clock moved behind him. To do this, I duplicated the original footage and made a mask around the actor. I then went forward, frame-by-frame, to remove the clock.
I then added some noise to the clock layer, to make it fit in with the original footage more convincingly. Then I added some defocus blur to make it fit in with the part of the shot it was in. As the shot is moving, I needed to keyframe it to become further out-of-focus as the camera moves further away. The shot was then complete.
Nathan
Subscribe to:
Comments (Atom)